Thursday, March 31, 2011
Butterfly Origami for prechoolers
Book Review: The Girl Who Loved Caterpillars
 The Girl Who Loved Caterpillars by Jean Merrill.
Monday, March 28, 2011
Animal of the Week - Snow Monkey
 Image from heartcurrents.com
Friday, March 25, 2011
Fun Friday Fact
Wednesday, March 23, 2011
Book Review: Tuatara and the Skink
 Ok, finding books about the rarest of reptiles, the Tuatara, was tricky, but TA DA~ here it is. The Tuatara and the Skink, is a New Zealand themed retelling of the Tortoise and the Hare. Here are a few facts about the Tuatara so you can guess whether it is the Tortoise or the Hare.
Tuesday, March 22, 2011
Turtle Tuesday

Monday, March 21, 2011
Animal of the Week - Blue Tongued Skink
 Image from www.reptileweb.com
There are five different groups of reptiles and a lizard is one. On Saturday, I had the opportunity to meet a Blue Tongued Skink.
Thursday, March 17, 2011
Fun Friday Fact
Challenge: Make a Flinker
Tuesday, March 15, 2011
Floaters and Sinkers
 We had a great, wet time today playing with floaters and sinkers. First we gathered stuff that we thought would either float or sink. These were our predictions which is a fancy science word for guess.
  Then we tested our predictions. This part was great fun. We used another science tool, tweezers, to reclaim our objects from the water.
 Monday, March 14, 2011
Animal of the Week - River Otters
 Image from Marylandzoo.org
Friday, March 11, 2011
Fun Friday Fact
Thursday, March 10, 2011
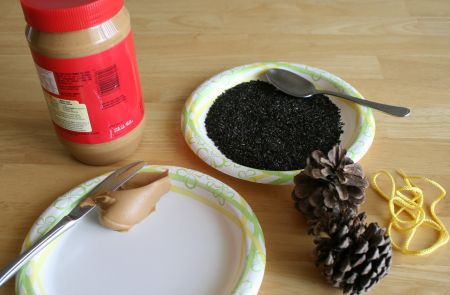
Making a bird feeder
 Image from MakeandTakes.com
Wednesday, March 9, 2011
Book Review: Feathers for Lunch
Monday, March 7, 2011
Animal of the Week - Squirrels
 Image from judywoods.com
Friday, March 4, 2011
Fun Friday Fact
Thursday, March 3, 2011
Make your own Fossils
Using modeling clay or Model Magic and objects like ferns, feathers, bones, or shells, you can create a fossil.
We just did this at the library and made all kinds of impressions from shells to toy dino prints to car tracks.
Flatten a piece of clay with your hand and press an object into it. You can just stop here and let the clay or Model Magic to dry and then paint it. This is how foot prints are fossilized.
If you are ready for a more realistic fossil, you can use plaster or clay. Carefully roll out another piece of clay about the same size. Cover the object with the second piece of clay and be sure it molds to the object. Gently pull the clay apart and you will have two impressions of your fossil! Once dry, you can paint the clay to look like rock.
Tuesday, March 1, 2011
Book Review: Dinosaurs Big and Small
Dinosaurs in the library!
We had dinosaurs in the library today! We had a great time exploring just how really big some of the dinosaurs were and how small some of them were. We know a lot about dinosaurs from fossils so we played paleontologist, scientist who studies dinosaurs, by digging out our own dinosaur clues. Then we got to make fossils.
What if you had a dinosaur? Make a habitat for your dinosaur in a shoe box, empty tissue box, or on paper. Cut out magazine pictures, use natural materials (pine sprigs, twigs, rocks) or paint your own food, water, and friends for your dino.
Counting. Use dinosaur shaped crackers for counting. If you find dinosaur shaped fruit snacks you can lay them out in a graph before eating to see which color has the most and which color has the least.
Sorting. Gather all your toy dinosaurs and then group into piles with at least two dinosaurs in each pile. What kind of piles did you make? Try again but make fewer or more piles. Try piling them by what foods they ate or when they lived.
Herbivore or Carnivore? Look at your teeth together. Some of our teeth are long, wide and sharp while others are just bumpy. What do we use our teeth for? What do the front teeth do better than the back teeth? You can extend this at lunch by offering meat like a hot dog and plants like lettuce or carrots. How do you eat different foods? Dinosaurs were the same way. Plant eaters used their teeth to grind leaves (molar = grind) and plant stems up while carnivores used their slim sharp teeth (incise = cut) to tear into meat. (Humans are omnivores – we eat both plants and meat.)
Dig it! Hide plastic dinosaurs in the sand box or a small box with corn meal. Give your child a small shovel, paint brush, a ruler, a sifter, and a hat as the tools of a paleontologist. They can dig the fossils and use the tools to carefully uncover and measure them. As they dig the dirt, they should put it through the sifter to uncover tiny fossils. You can make footprints or scenes with toy dinosaurs as well.


